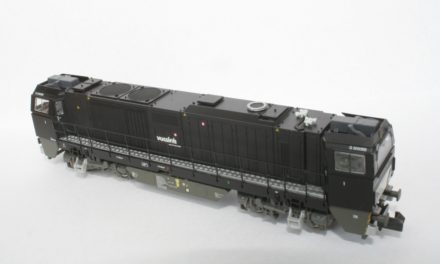
This Fleischmann control car (part no 8600) already has LED front lights. I decided to do a ‘quick and dirty’ installation of a DCC decoder, along with interior lighting.
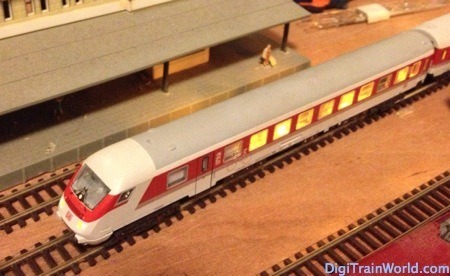
Fleischmann 8600 IC Control car
Preparing the LED boards
This Fleischmann control car sells for more than €70. I bought it used (a front bumper is missing) for less than €15.
To my surprise, this coach had direction-dependant led front lights (I don’t expect much when buying second-hand). The problem of course is that the front lights don’t change color in DCC mode: the board is designed for DC operation.
It has power feeders on all eight wheels.
The led board is small but is easy to decipher. It basically contains two different series circuit. One has 3 yellow LEDs, the other one 2 red LEDs, both with a separate resistor. Though they are soldered together at the ends, it would be easy to separate them and obtain 2 independent series circuit:
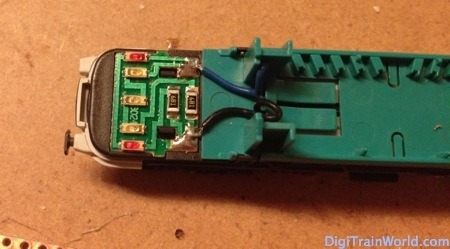
Control car led board
As for the interior lighting, I didn’t want to spend 18€ in a Fleischmann accessory. I used my standard method: cutting an electronic test board:
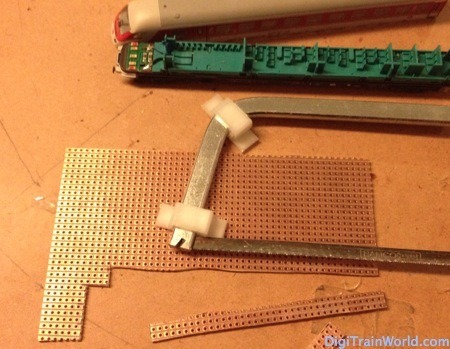
Cutting the test board
I soldered 4 yellow SMD LEDs, and an SMD resistor at the end. The interior lighting board was ready.
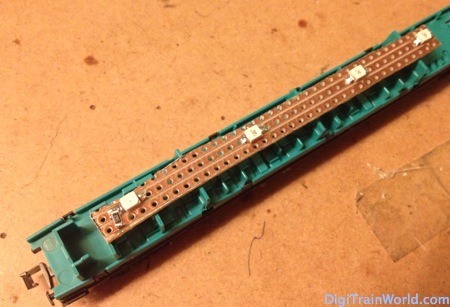
Board with LEDs
Back to the front lighting board. With a hobby rotating saw, I separated the soldering points at both ends of the circuit. This resulted in 2 clean circuits for front and rear lighting. I just needed to check the polarity, and solder the appropriate cables. The cables you see below follow the NEM651 principles: yellow & white for front & rear lights (negative pole) and blue for the common (+) pole.
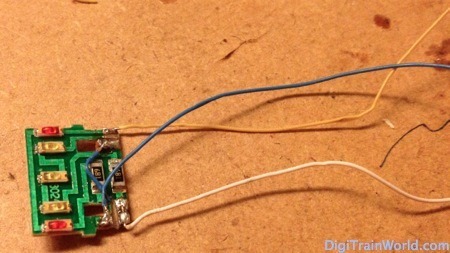
Front LED board with wires
As for the interior lighting board, it will be on no matter the direction of the train. So it will be connected to outputs 1 & 2 of the decoder at the same time.
I added a small board with 2 SMD diodes. This prevents the front and rear lights from being bridged together (we still want those to light up discretely).
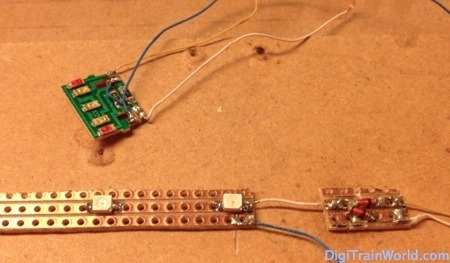
Front & interior LED boards
Assembling with the decoder
The chosen decoder was my usual Tams FD-R Basic function decoder, with 2 outputs. I added a 220uF capacitor to avoid flickering. Since this was to be a quick install, I soldered it directly to the FD-R:
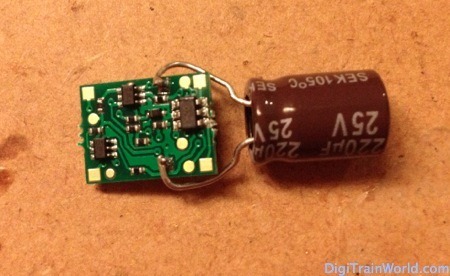
Tams FD-R Basic with capacitor
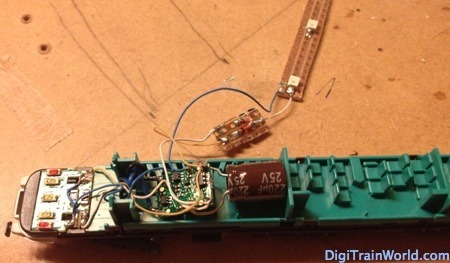
All that was left was to solder everything together. I am not an expert, nor do I have the best soldering iron. But the only thing that matters in such install for me, is not to damage the decoder.
Fleischmann 8600 IC Control Car
A touch of hot glue was used to stick the lighting board to the roof of the car. I also added white stickers on 3 windows of the car, for the cable mess and capacitor not to be seen.
The decoder was easily programmed. However, the LEDs don’t use enough power for the decoder to confirm programming orders to the command station. This was mentioned in other posts (here for example),
Conclusion
The Fleischmann control car was a good basis to work on. I am quite satisfied with the result.
Front lights finally change color with the direction of travel, and interior lighting is a nice plus. The only thing missing is a light in the control cab…but that will be for next time!
For €15 (Decoder €10, LEDs €3 and miscellaneous cables), this was cheaper than the non-DCC lighting board sold by the manufacturer. This small project was a good excuse for not making any real progress on my layout 🙂


Good article! It will be very useful for me, because I’ve purchased the same train (and also a second-hand one). I didn’t know that the tail lights shouldn’t work in DCC… So I will follow your instructions 😉
Regards,
Jose.
Well, the tail lights will work, but all lights will be on, which will give you an orange color (red + yellow).
There are however some driving cars from Minitrix (and maybe now other brands) that have functioning (red or yellow) head lights in DCC…without a decoder. There is a small mechanism attached to the wheels, that moves depending on the direction of travel and powers the corresponding light. It’s kind of hard to explain in text, but it’s a pretty smart small mechanism. I noticed this mechanism on the driving cab of the “City Airport Train” package.