If you are planning to automate your layout or have hidden tracks, detecting locomotives is not enough: you need to detect cars too.
Detection by power consumption is the most common way of detecting trains on a layout. Infrared ‘barriers” or magnetic detectors or other means also have their advantages in some specific situations, but in most 2-rails layouts, they’re not universal.
Online user feedback in this area is rich. I tried 2 methods to render unpowered cars (or rather their axles) detectable: using a resistive laquer, or installing small SMD resistors.
Why the trouble?
Being able to detect cars has 2 main advantages; it brings:
- Security
Detecting cars that may have detached from a train in hidden sections. - Precision
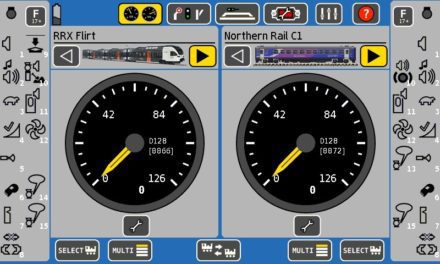
An automation software or command station will be able to handle trains better by knowing exactly where the entire train is. This include stopping trains “pushed” by a locomotive exactly where they should.

Trains with leading cars will not be detected entirely without proper axle treatment
Of course, if you have passengers coaches with interior lighting, they will be consuming power and be detected…sometimes.
In N-Scale, many German manufacturers only have their passenger cars lighting systems draining power from one side of the track on each bogie. Apart from the fact that it leads to flickering, it also has a major drawback for detection. Since in N (and 2 rail systems in general), there is only one detecting rail out of 2, that means a passenger car with lighting has a 50% chance of being detected, depending on which side the detecting rail is…
The only way of securing car detection is to make sure the axles get detected. There are 2 main methods to do that, I tried both.
Method 1: Resistive laquer
The solution that seemed the easiest (and the cheapest) was to use resistive laquer. I didn’t know what that was, but it’s precisely what you may think it is: a liquid with the characteristics of a resistor, conducting electricity…but not all of it.

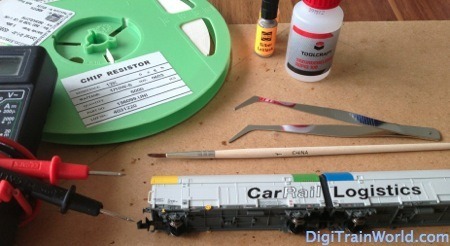
Uhlenbrock 40410
Uhlenbrock sells a resistive laquer for our exact purpose (art 40410). A brush is attached to the lid, so there is nothing else to buy.
Just shake the bottle, open it, apply the laquer on the axle generously, over the little back plastic isolating part that separates the axle. Then wait a few minutes.
Sounds easy doesn’t it? Well, it’s not. There may be better quality products out there, but I found the solution very unreliable. I never got an axle to be detected after a first layer, and usually had to apply 2 or 3 layers before obtaining a result.
I have read testimonies online, that stated that the laquer actually can “burn” in case of short circuit of the layout, meaning the conductive power of the axle will disappear in the blink of eye. I have never had such an issue, but this only confirmed what I thought: resistive laquer is not the best solution.
Method 2: SMD Resistors
This is a method that I had found online. It scared me, sounded like killing a fly with a cannon. The idea however is simple: if you want your axles to act as a resistor in order to get detected…why not simply install a resistor on them?
What you need
There used to be an excellent guide in German (on www.nbf-worms.de), with an exact list of what you need:
- Quick and strong glue, to stick the resistor to the axle
If you live in Germany, this would be Conrad art. 240460 - Silver paint, to “connect” your resistor to the axle.
BEWARE: this is different from the resistance laquer mentioned earlier. This silver paint is fully conductive with no resistance, it is “liquid wiring” in a way.
Again for Germany, you can buy Conrad art. 530042. I went for another silver paint, by the model train brand “Busch”: article 5900. Bush products are surely available outside of Europe, but silver (conductive) paint is a pretty standard article anyway. - SMD resistors
SMD resistors are available in different standard shapes, we will use the standard “0603” type (0,06″ x 0,03″).
The guide advises 17,4 KΩ, while others people said they use 10 KΩ. The later is supposed to be more easily detected by some devices. I found a very cheap bundle of 5000 12KΩ resistors at 7.21€. I will likely never need 5000 resistors (2500 cars) in my whole life, but at 0,001442 € each, it seemed like a reasonable commitment to model railroading 🙂

Little SMD resistors
Treating your cars
- Prepare your cars or axles
Most guides I found online advise taking the axles off the cars (at least in N). I found it personally easier to just leave them where they are; you can temporarily block the axle with a little bit of temporary gum glue (e.g. “UHU Patafix”).
Make sure to note which side of the axle has the small round plastic isolator (usually black), this is where we’ll put the resistor. - Prepare the glue
Drop a bit of glue on a clean surface (plastic, glass).

- Apply the glue
Use a needle head to drop a very tiny quantity of glue on the black isolator of the axle, where the resistor will be.

- Stick the resistor where the glue already is.
Make sure one side is close to the axis, while the other “leans” over to the external wheel.
Wait a few minutes for the glue to dry.


Placing the resistor with glue
- Apply the silver paint
Link one side of the resistor with the central axis, the other one with the external wheel. Make sure to not put to much paint and to not bridge the 2 resistors sides with it.

Final result with silver paint
- Test!
Use a multimeter to check the resistance of your axle. I had to reapply a bit of silver paint only in rare cases.
Finally, test the car on your layout. If it doesn’t get detected, it may mean your detectors have a lower detecting threshold and need lower resistance values.
If you realize you’ve put too much paint, and that your axle is now 100% conductive (= short circuit guaranteed), that shouldn’t be too bad. You should be able to force remove the SMD resistor, thus resolving the short circuit issue in most case. Just start again for the faulty axle by putting another resistor on the other side.
Conclusion
Using SMD resistors ended up being easier than the resistive laquer method. It requires more tools, but it works immediately in most cases, and will last much longer.
Unless you really want every single axle to be detected, putting a resistor on the 2 outermost axles of each car will suffice.
One last thing you may wonder: will that use power from my DCC command station? Yes it will…but really not that much, remember your electronics classes 😉
Here is an example for 14V. It’s a simple DC calculation, but gives us an idea of magnitude for DCC:
I = U / R = 14V / 12,000Ω = 0,00116A = 1,16mA per axle with 12KΩ resistor
Which means that, with 20 cars (each with 2 equipped axles), you will be only using :
20*2*1,16 = 46,4mA = 0,046 A
With most booster delivering between 2 and 4 Amperes, don’t be afraid !
Whichever the method, preparing axles for detection is a tedious, and not-so-rewarding process. Just put your favorite music on, and use a rainy Sunday morning for treating a few cars 😉
External links
- Another example in English (with H0 axles): http://www.cnymod.com/Resistor_wheelsets.html


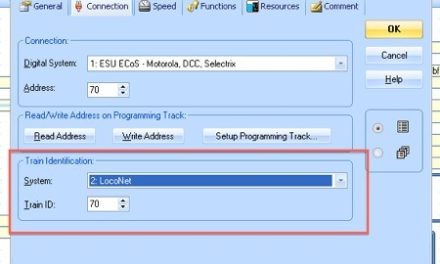
Pierre,
You use the axle detection method in conjunction with TrainController software. At this moment, I have no intention to use PC control for my layout, just walkaround NCE PowerCab DCC. Could I apply the axle detection method in another way i.e. non-PC control? If so, how? I am interested to use some (reasonable cost) approach of detecting track occupancy esp for hidden tracks.
The axle detection is of course optional: for many people, detecting the locomotive will be enough. Maybe you should not worry about it (I worry about personally because I want to be 100% sure to detect “lost cars” in my hidden station).
To answer your question: of course, any method that transforms the axles into a “resistor” consuming a little power will work as long as you are using “power usage” based detectors. There are other methods of course (magnet or Infrared-based), but these I really wouldn’t advise. In any case: detecting power from locos or resistive axles does not limit you in terms of “where” the detection signal goes.
What you would need is a simple “power consumption detector”, that does not deliver its result to a “feedback bus” (such as S88 or Loconet), but rather visually (integrated LEDs) or to simple “on/off” connectors (to which you can connect LEDs, or even later an actual S88/Loconet module). An example I know is http://www.conrad.com/ce/en/product/217326/21-01-026-Electronic-track-busy-reporting-GBM-1-4-x-component/?ref=detview1&rt=detview1&rb=1 but this is a kit you need to solder yourself. You need to look around, especially if you’re not in Europe. There are probably many similar and even cheaper devices out there.
As I plan to run long trains, I thought of the idea of having axle detection. Half of my trackage is by design hidden; hence, some form of detection would help me note their position. I am not planning to use any PC-based control, thus, a visual indicator – either at side panel of each module or at a CTC panel would be needed.
Initially I thought of the photodetector but I read it does not work well.
Thanks for the Conrad link. I will evaluate the kit.
P/S: I am now living in Frankfurt, Germany.