An helix is great when you lack space, but it’s a hassle to build.
In my case, what makes things more complicated, is that the helix is not a regular 2-, 3- or even 10-floor loop. Each level is different, and I finally had the courage and the time to add an extra level.
Location, location, location
As I explained in a previous post, I lack space. Even if I didn’t, I am moving often. My layout is modular, and the fourth module to the left is an helix.
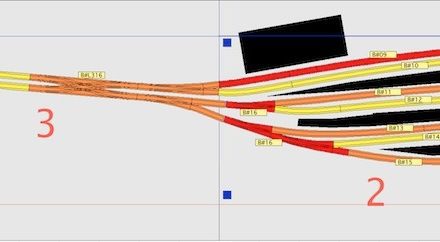
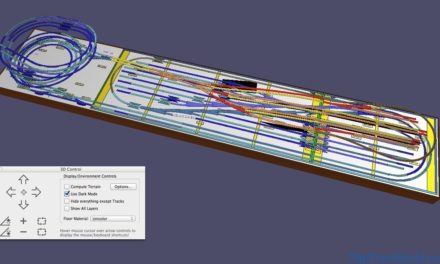
Here is a reminder of my layout plan, levels 0 and 1:

Lower level (L0) of my N-scale layout

Upper level (L1) of my N-scale layout
So back to the helix, it has three purposes.
Firstly, it allows train to go up from “level 0” to “level 1”. Level 0 is mostly hidden, except the double-track straight line closer to the “player”. I like to call it the high speed line. Sadly, until I can have more than 4 modules, my high speed trains won’t have time to reach 300kmh to scale on a distance of less than 3 meters.
Then, I decided to add a third inner track between level 0 and 1. This allows a third train to go up or down, or to just wait. Unfortunately, I had to use Radius 1 for that. This is the historical 192mm radius launched by Arnold (I think) and also used by Fleischmann. I avoid this radius as much as possible. The problem is not only that some rolling stock (notably Kato) doesn’t always work on R1. The issue is also that even if the trains are capable of using this radius, the chances of derailment are higher. I decided this was a risk I could take. I will just tell my PC control software to only send a limited selection of trains through this track (mostly short EMUs and DMUs).
Finally, and more importantly for today, the helix goes up again, from level 1. Ultimately, after 2.5 loops, it will terminate in a visible 2-track dead-end station. This small “local station” will be sitting on top on a big mountain. Not very realistic I admit, but I’ve got to do what I can. Let’s not loose sight of the size I set for the modules: only 60x80cm (about 23×31 inches).
You cannot see those levels on the layout pictures, but you can see on the plan of layout 1, that there is a switch with a diverting track (here apparently leading to nowhere).
Planning
Until recently, I didn’t want to hear about precise track planning. It’s a hobby, not a construction job. Well, when it comes to this part of my layout, I have no choice. The clearance in the curves is very limited, so I need to be planning relatively precisely. Cutting wood to the millimeter is a pain, so I have set myself a margin of about 5mm (0.2 inch) when doing the dirty work.
My entire layout has been planned with RailModeller for Mac. The layout plans here are screenshots of those designs. I cannot say if it’s the best out there, but there aren’t a lot of similar applications that work natively on Mac OS.
It has a handy function: the ability to print a plan at 1:1 scale. Once the plan printed, I like to attach the pieces, put it on the wood, and then only cut the wood. I feel a bit like a kid playing with cissors and scotch tape…which brings me back to the hobby part of it 😉
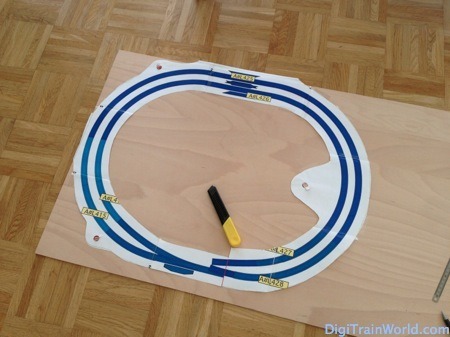
Here is the printed track plan at full scale:
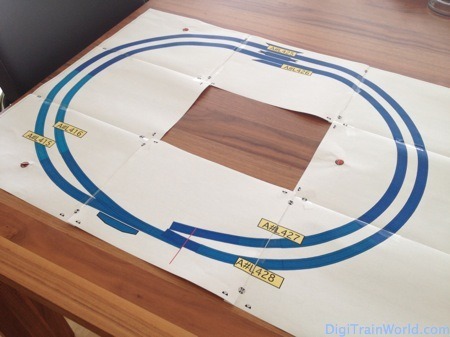
Printed track plan at full scale
Doing
Pictures are better than words, so I won’t comment all steps. Once thing to note though, I like to present both the printed plan and the cut board of wood, just to be sure I didn’t make a big mistake in my measures.
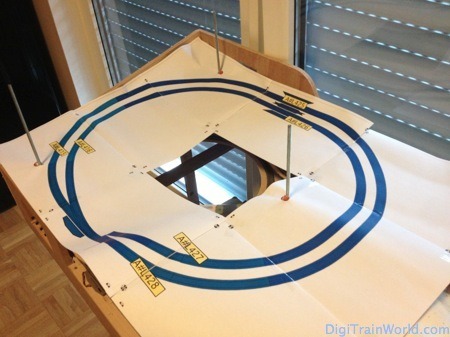
Presenting the track plan
Preparing the wood
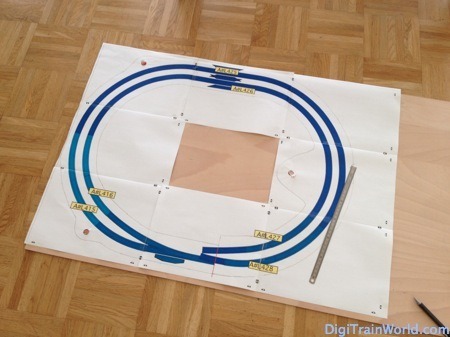
Cutting the track plan
Presenting the wooden panel
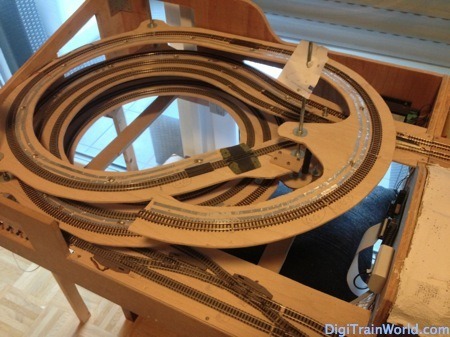
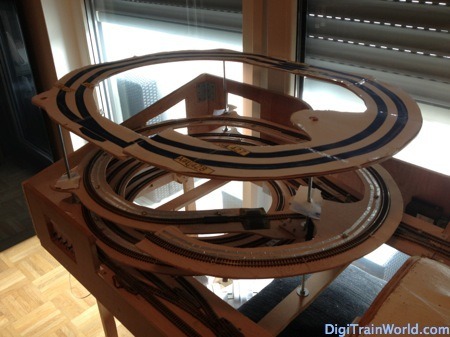
The last step is to prepare the holes for the small metal poles (3 in my case), that hold the helix together. After a last check, here is the final result:

The added extra floor
I will be adding the track later. It also involves pre-soldering the wires, and I am becoming lazy for today!
For those who wonder, the yellow labels are the numbers of the future detection sections. I am kind of a documentation freak. The “A” stands for booster circuit A, and the L followed by the number is the Loconet feedback address. This is module 4, so all the feedback address range starts at 400. I am glad I switched from S88 occupancy detection…
I will post the track pictures in a second post. In the meantime, don’t hesitate to tell me if you have tips on how to do things better!


Pierre, what is the track spacing you use on the helix? I am planning min 33mm between centrelines of my double tracks in the helix. You seem to have more.
Hi Jimmy, no I am indeed using about 30mm; which is the historical spacing for us in Europe. I am using mostly R2 and R3 from Fleischmann without ballast (formerly “Roco N”) track. See here: http://www.fleischmann.de/uploads/documents/pdf/2/Technik-Info_N-Gleis_ohne_Schotterbett.pdf
Thanks Pierre for the clarification and the Fleischmann brochure. I am using Peco Finescale tracks – concrete and wooden ties – and their turnouts. I am considering Fleischmann’s turnouts but would need to adjust to their 33,6mm track spacing.
I would provide more spacing in helix than on visible part of the layout. I try to follow the NEM standards.
Hi Jimmy, I am doing exactly the same thing: Peco Finescale on the visible parts, then Fleischmann (and “Fleischmann without Ballast”=old Roco N) on the invisible parts. This includes the helix, so I am guessing I also have 33.6mm spacing in curves (to be honest, I don’t remember, but I know it’s about 3cm…).
To answer your comment on another article: no, I am afraid I did not have an older blog. I just had an old layout that was destroyed before being ever finished 😉